Interactive weather layers to customize for MapTiler Cloud and MapTiler SDK JS


Live weather data in your map!
The Weather module for MapTiler SDK contains a set of weather-specific tiled layers to put into your map, just like any layer!
Here are some features:
- 4-day forecast 📅
- global coverage 🌐
- hourly precision ⏱
- fresh data every few hours (generaly ~6h) 📦
- animated 🏁
- highly customizable ✨
- plenty of built-in color ramps 🎨
- easy to setup with nice default settings 🙌
- pick weather values for any lon/lat (and mouse move) 📌
- included in your FREE MapTiler Cloud plan! 😎
A dedicated layer for each of the following variables:
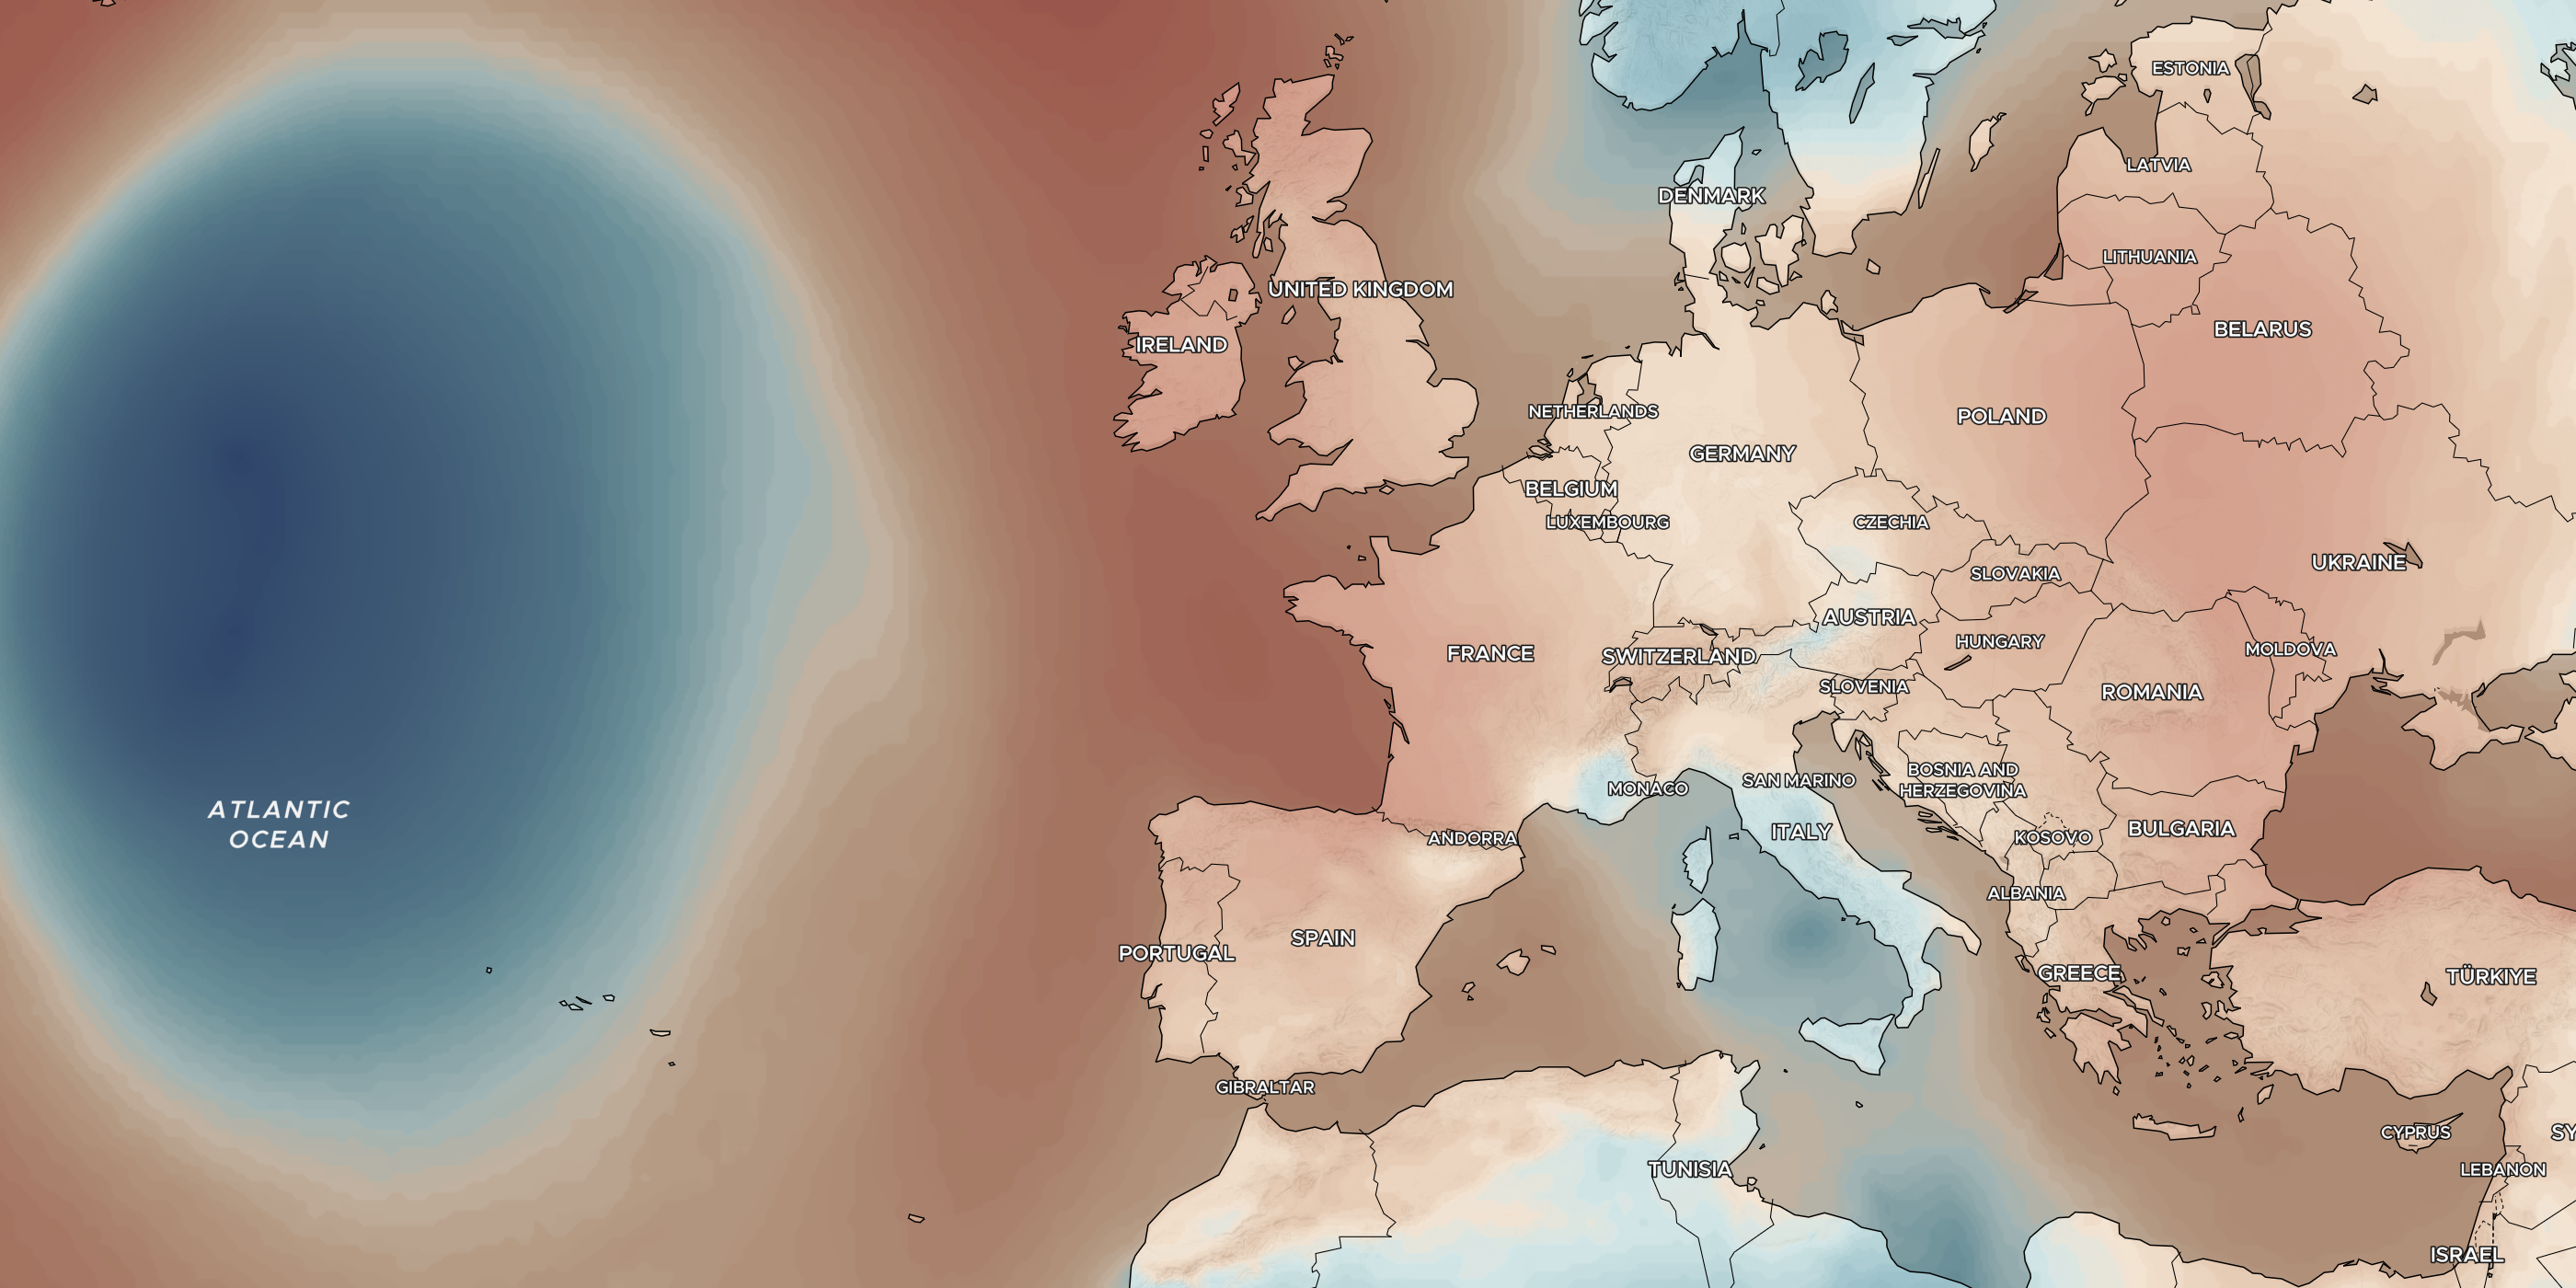
- temperatures 🌡️
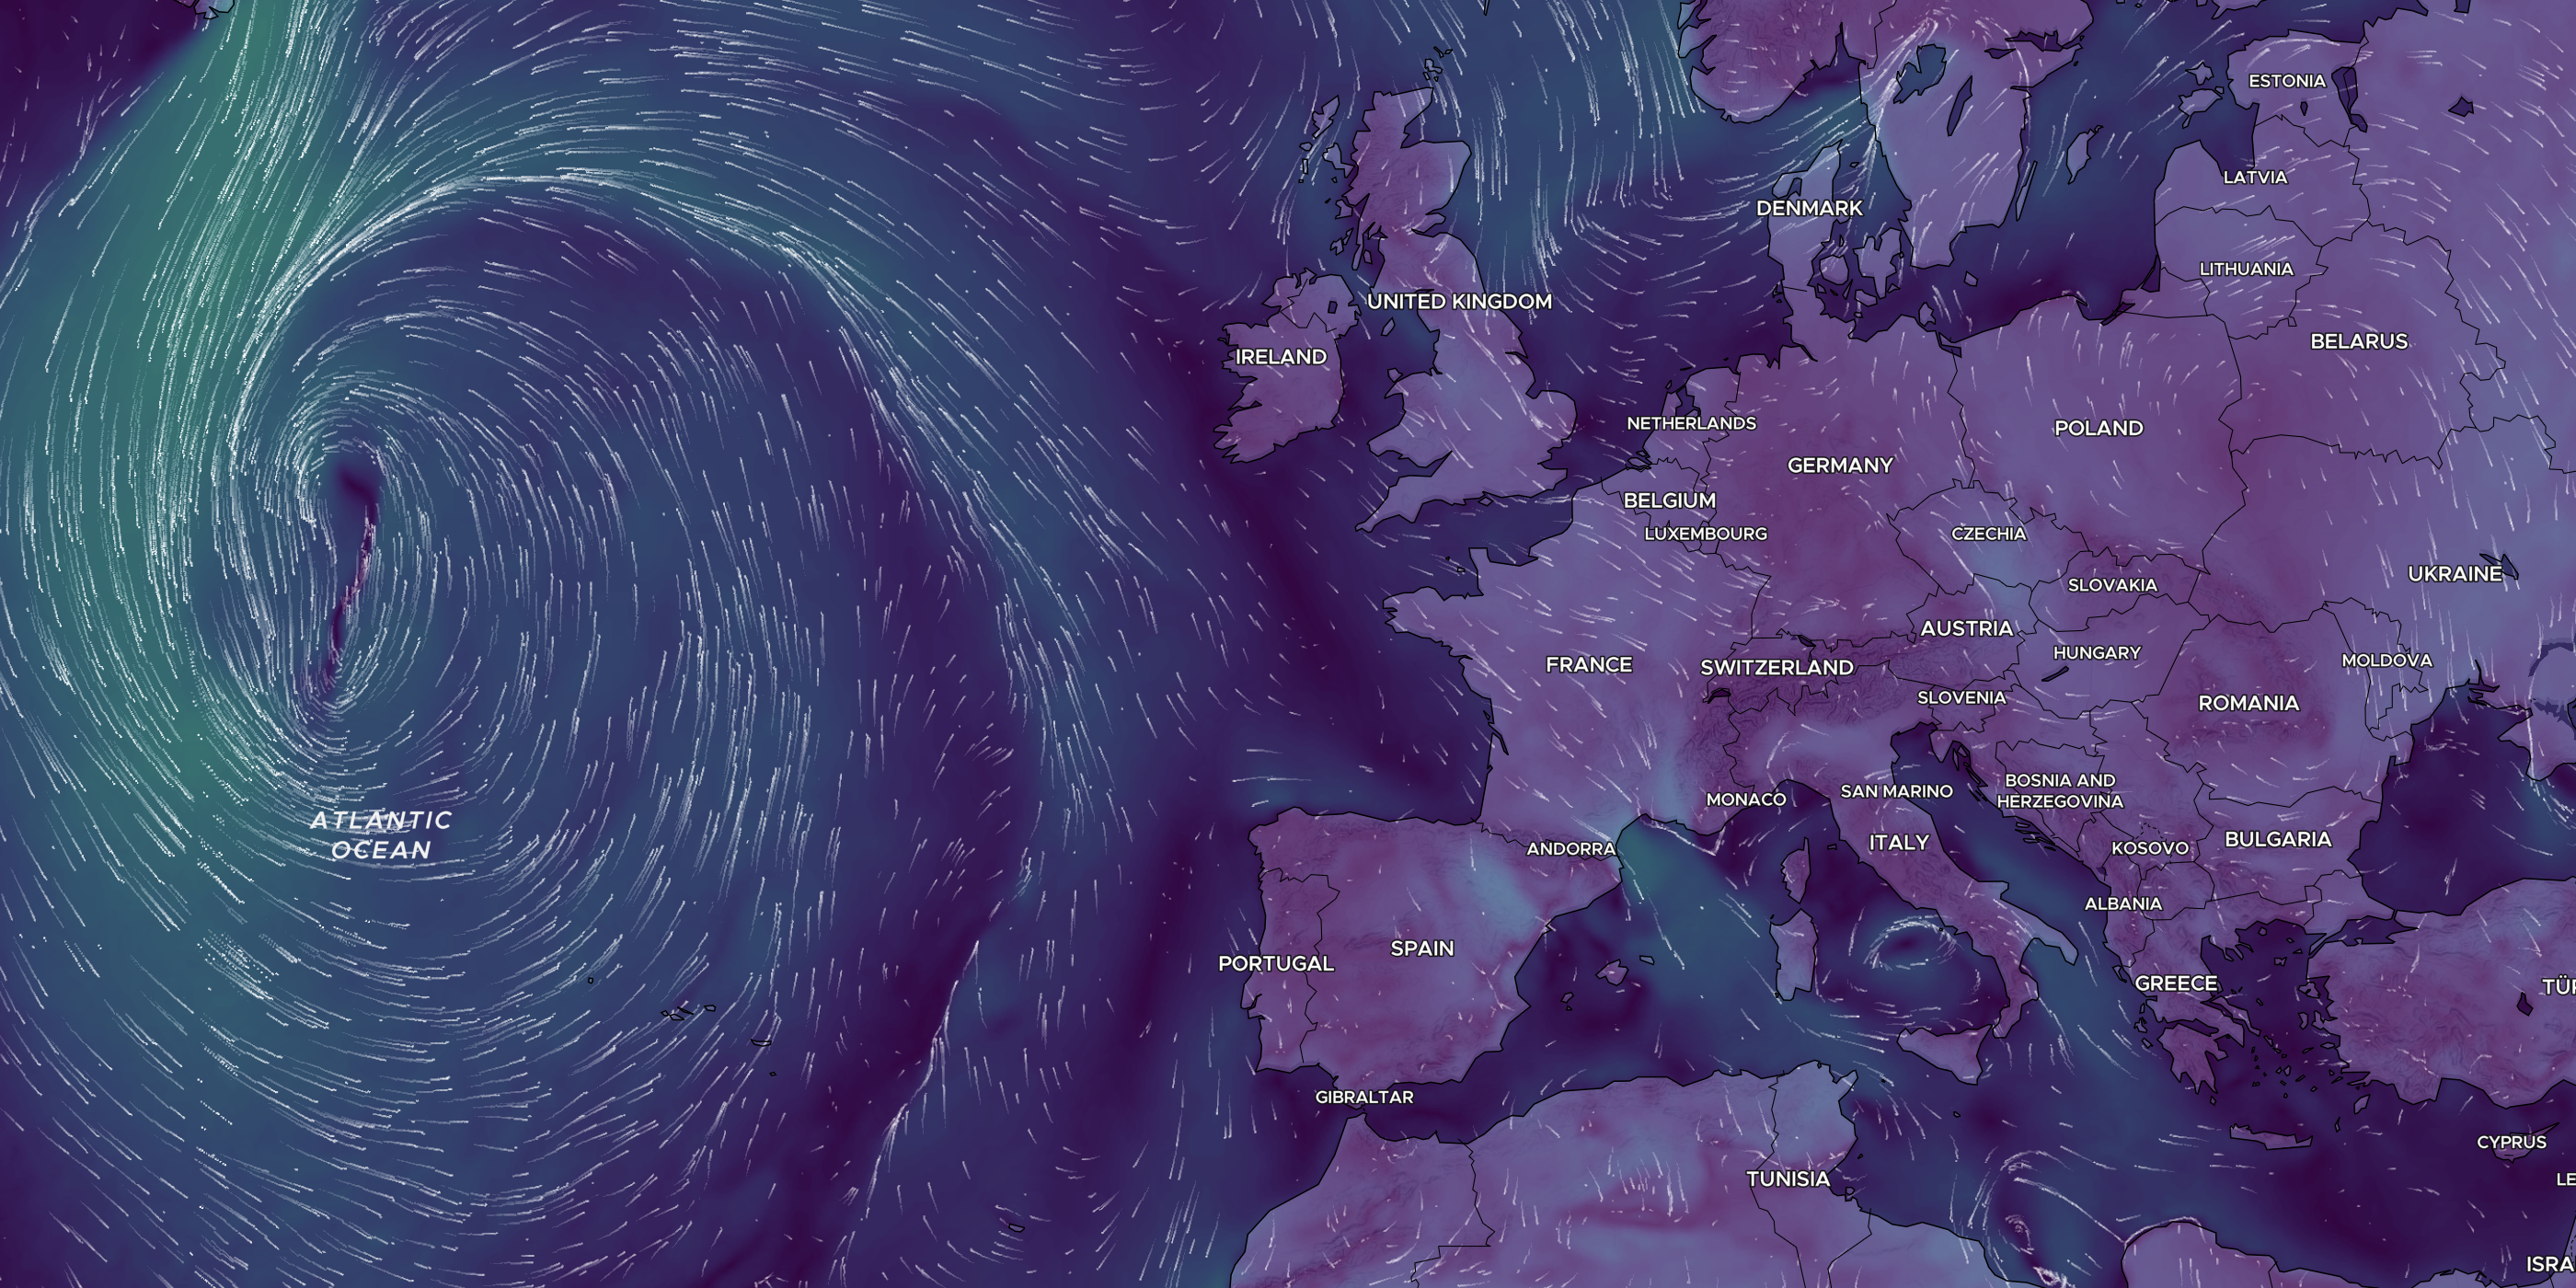
- winds ༄
- presure 🌀
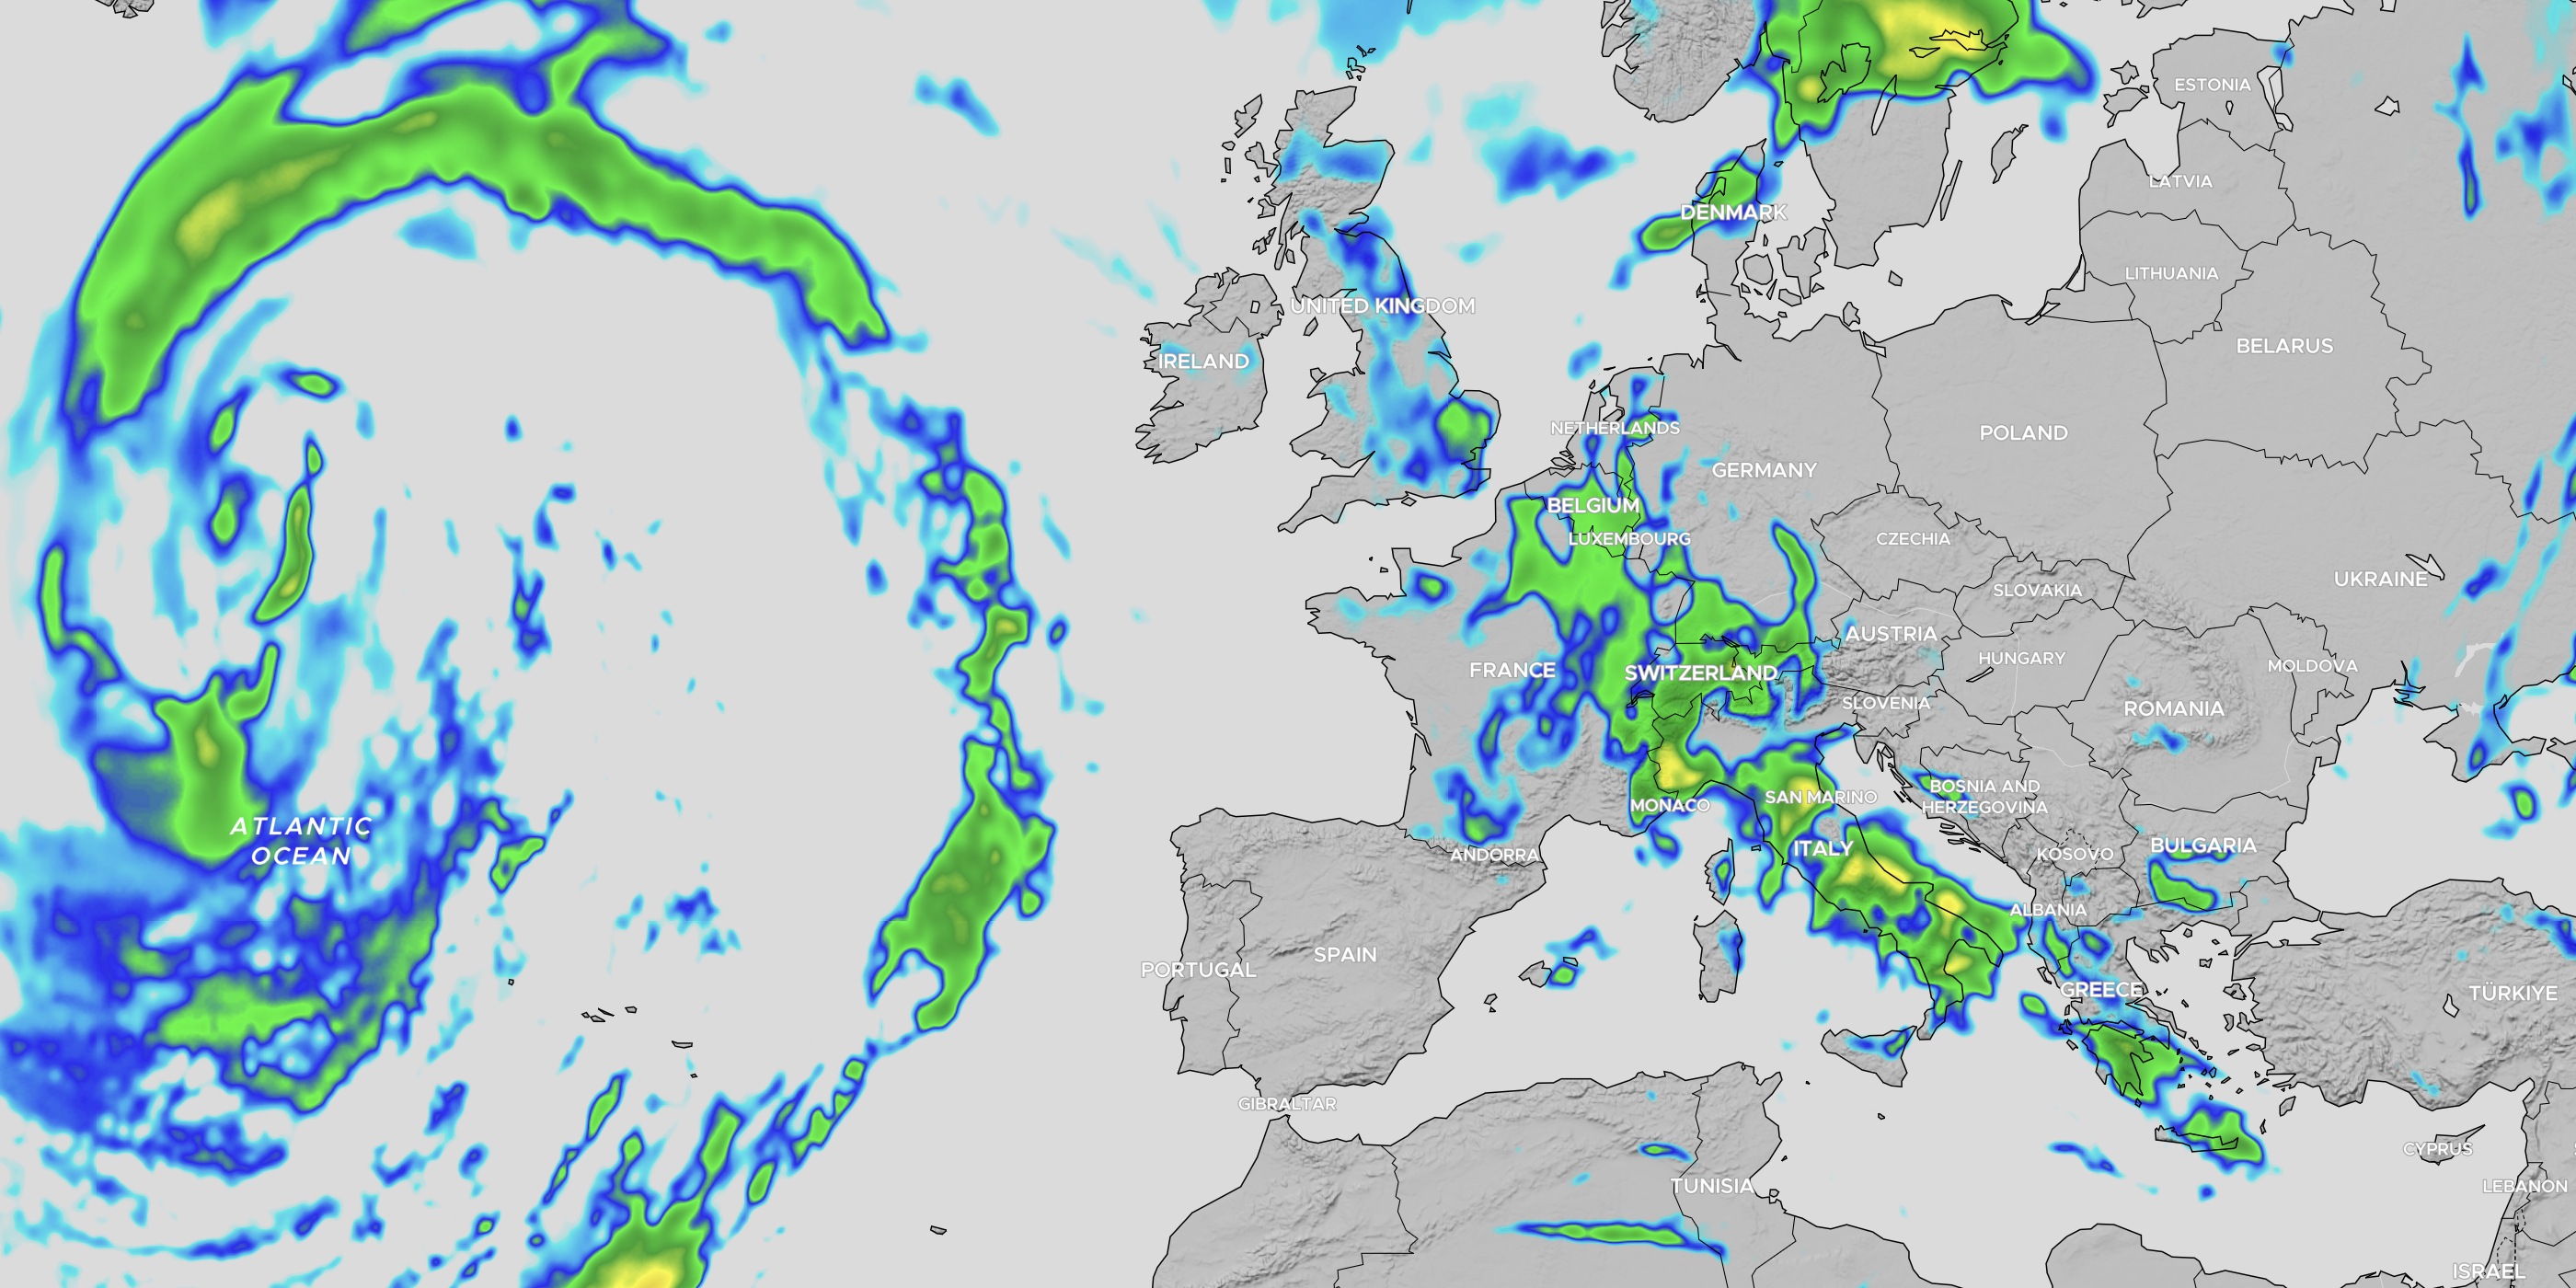
- precipitations 🌧️
- radar 📡
Install
npm install --save @maptiler/weatherEvery layer requires to use MapTiler SDK (which is built on top MapLibre Gl JS), if you don't have it already as part of your project, you can install the two together:
npm install --save @maptiler/sdk @maptiler/weatherGetting Started
Since all the layers are going to be added to a Map, let's instanciate a map first:
import { Map, config, MapStyle } from "@maptiler/sdk";

// Make sure you set your MapTiler Cloud API key:
config.apiKey = "YOUR_API_KEY";

// Let's assume you have a div container to place your map in
const map = new maptilersdk.Map({
  container: someComtainer,
  style: MapStyle.DATAVIZ.DARK,
});
Then, regardless of the type of weather layer you want to add to your map, keep in mind that it behaves just like a regular SDK/MapLibre layer, so you probably want to place it under some labels and border. What we advice is to place it underneath the water layer that we make partially transparent:
map.on('load', function () {
  // Make the water layer a bit transparent:
  map.setPaintProperty("Water", 'fill-color', "rgba(0, 0, 0, 0.5)");

  // Add the weather layer underneath the `water` layer:
  map.addLayer(layer, 'Water');
});
Layers
Each type of layer comes with a dedicated constructor to which can be provided the same minimal set of options:
idof typestring. Default: depends on the type of layer.opacityof typenumber. Default:1.colorrampof typeColorRamp. Default: depends on the type of layersmoothof typeboolean. Default:true(colors are nicely interpolated)
Temperature Layer

Create a temperature layer:
import { TemperatureLayer } from "@maptiler/weather";

// After creating a Map instance like in the `Getting Started`

const layer = new TemperatureLayer(); // using default settings

// or
const layer = new TemperatureLayer({ /* options */ }); // overwriting default

// Add the layer like in the `Getting Started`- Forecast for temperatures at 2m above ground
- The default layer ID is
"MapTiler Temperature" - The unit is degree Celcius (°C)
- The default color ramp is
ColorRamp.builtin.TEMPERATURE_2, which spans from-70.15°Cto46.85°C - Maximum range possible spans from
-127°Cto128°C
Pressure Layer

Create a pressure layer:
import { PressureLayer } from "@maptiler/weather";

// After creating a Map instance like in the `Getting Started`

const layer = new PressureLayer(); // using default settings

// or
const layer = new PressureLayer({ /* options */ }); // overwriting default

// Add the layer like in the `Getting Started`- Forecast for air pressure at mean sea level
- The default layer ID is
"MapTiler Pressure" - The unit is hecto Pascal (hPa) or millibar (mbar)
- The default color ramp is
ColorRamp.builtin.PRESSURE_2, which spans from900hPato1080hPa - Maximum range possible spans from
900hPato1080hPa
Precipitation Layer

Create a precipitation layer:
import { PrecipitationLayer } from "@maptiler/weather";

// After creating a Map instance like in the `Getting Started`

const layer = new PrecipitationLayer(); // using default settings

// or
const layer = new PrecipitationLayer({ /* options */ }); // overwriting default

// Add the layer like in the `Getting Started`- Forecast for precipitation of all sorts (rain, snow, hail, sleet) in amount per hour
- The default layer ID is
"MapTiler Precipitation" - The unit is millimeter per hour (mm/h)
- The default color ramp is
ColorRamp.builtin.PRECIPITATION, which spans from0mm/hto50mm/h - Maximum range possible spans from
0mm/hto50mm/h
Radar Layer

Create a radar reflectivity layer:
import { RadarLayer } from "@maptiler/weather";

// After creating a Map instance like in the `Getting Started`

const layer = new RadarLayer(); // using default settings

// or
const layer = new RadarLayer({ /* options */ }); // overwriting default

// Add the layer like in the `Getting Started`- Forecast for maximum composite radar reflectivity value
- The default layer ID is
"MapTiler Radar" - The unit is radar reflectivity factor (dBZ)
- The default color ramp is
ColorRamp.builtin.RADAR, which spans from0dBZto75dBZ - Maximum range possible spans from
-20dBZto80dBZ
Note: the built-in color ramp ColorRamp.builtin.RADAR_CLOUD was specificaly designed by our team to represent cloud coverage, and may be more intuitive for generalistic weather forecast usecases. Give it a try!
Radar reflectivity measure the amount and size of particles that are in the sky, but not only precipitation.
- dust and insects: from
-10dBZto5dBz - light mist / drizzle / flurries:
~10dBZ - mist / drizzle / flurries:
~15dBZ - very light rain or snow:
~20dBZ - light rain or snow:
~25dBZ - light to moderate rain or snow:
~30dBZ - moderate rain or snow, possible sleet:
35dBZto40dBZ - moderate to heavy rain or snow, possible sleet:
~45dBZ - heavy rain or snow, possible sleet:
~50dBZ - very heavy rain or snow, with small hail possible:
~55dBZ - extreme rain or snow, with moderate hail possible:
~60dBZ - extreme rain or snow, with large hail possible:
~65dBZ
Read more about radar reflectivity
Wind Layer

Create a wind layer:
import { WindLayer } from "@maptiler/weather";

// After creating a Map instance like in the `Getting Started`

const layer = new WindLayer(); // using default settings

// or
const layer = new WindLayer({ /* options */ }); // overwriting default

// Add the layer like in the `Getting Started`- Forecast for speed and direction at an altitude of 10m above ground
- The default layer ID is
"MapTiler Wind" - The unit is meter per second (m/s)
- The default color ramp is
ColorRamp.builtin.VIRIDIS, which spans from0m/sto40m/s - Maximum range possible spans from
0m/sto75m/s
The wind layer contains both a background to which is applied a color ramp and a set of moving particles, for this reason, the constructor WindLayer has more options that then other weather layers. Please refer to our official documentation to have the complete list.
Layer Methods
.getAnimationStartDate(): Get the start date of the animated sequence, as aDateobject.getAnimationStart(): Get the start date of the animated sequence, as a UNIX timestamp in seconds (number).getAnimationEndDate(): Get the end date of the animated sequence, as aDateobject.getAnimationEnd(): Get the end date of the animated sequence, as a UNIX timestamp in seconds (number).setOpacity(opacity: number): Set the layer opacity, from0(fully transparent) to1(fully opaque).getAnimationTimeDate(): Get the current time of the animation, as aDateobject.getAnimationTime(): Get the current time of the animation, as a UNIX timestamp in seconds (number).setAnimationTime(time: number): Set the animation time, as a UNIX timestamp in seconds (number)- Emits event
animationTimeSet
- Emits event
.animate(factor: number): Plays the animation at a given speed factor. Pauses if factor is0- Emits event
playAnimationiffactoris greater than0 - Emits event
pauseAnimationiffactoris0
- Emits event
.getAnimationSpeed(): Get the animation speed factor.isPlaying(): Get if the animation is currently playing.pickAt(lng: number, lat: number): Get the value(s) as an object. Depending on the type of layer, the values returned can be in different units. Please refer to the official documetation- async
.onSourceReadyAsync(): Async function corresponding to the"sourceReady"event. Resolves directly if source is already ready, or awaits the event"sourceReady"if not.
Layer Events
To add a calback function to a layer event, do the following:
layer.on("eventName", (e) => {
  // Do something
})
Here are the possible events:
sourceReady- ⚡ Called only once after the layer has been added to the map, when all the necessary weather data source are loaded and ready to be used.
- 🍱 The event callback parameter is as such
{map: Map, layer: Layer}
playAnimation- ⚡ Called when the animation is starting to play or plays after having been on pause after calling
.animate(...) - 🍱 The event callback parameter is as such
{time: number}withtimebeing the timestamp in seconds
- ⚡ Called when the animation is starting to play or plays after having been on pause after calling
pauseAnimation- ⚡ Called when the animation is being paused after calling
.animate(0) - 🍱 The event callback parameter is as such
{time: number}withtimebeing the timestamp in seconds
- ⚡ Called when the animation is being paused after calling
tick- ⚡ Called for each animation update, possibly many times per seconds
- 🍱 The event callback parameter is as such
{time: number}withtimebeing the timestamp in seconds
animationTimeSet- ⚡ Called when the progress time of the animation is manually set with
.setAnimationTime(...) - 🍱 The event callback parameter is as such
{time: number}withtimebeing the timestamp in seconds
- ⚡ Called when the progress time of the animation is manually set with
Note that most layer methods can only called after the event sourceReady has been emmited.
Color Ramp
There are many builtin color ramps that are ready to be used. since most of them are defined in the interval [0, 1], they need to be scaled acording to their intended usage. Let's see how to do this:
import { ColorRamp } from "@maptiler/weather";

// Let's use the Viridis color ramp,
// but we want to use it for air pressure, so on a range [900, 1080] hPa
const viridisPressure = ColorRamp.builtin.VIRIDIS.scale(900, 1080);
Note that the .scale() method first clones the color ramp on which it is called so that the original one is not modified.
A color ramp can also be flipped with .reverse() or generate a canvas of itself with .getCanvasStrip() to create UI elements.
To create a new color ramp manually that can be used with any of the weather layers, you must provide a color stop definition as follow:
import { ColorRamp, TemperatureLayer } from "@maptiler/weather";

const myTemperatureColoramp = new ColorRamp({
  stops: [
    { value: -65, color: [3, 78, 77, 255] },
    { value: -55, color: [4, 98, 96, 255] },
    { value: -40, color: [5, 122, 120, 255] },
    { value: -25, color: [6, 152, 149, 255] },
    { value: -20, color: [8, 201, 198, 255] },
    { value: -12, color: [20, 245, 241, 255] },
    { value: -8, color: [108, 237, 249, 255] },
    { value: -4, color: [133, 205, 250, 255] },
    { value: 0, color: [186, 227, 252, 255] },
    { value: 4, color: [238, 221, 145, 255] },
    { value: 8, color: [232, 183, 105, 255] },
    { value: 12, color: [232, 137, 69, 255] },
    { value: 20, color: [231, 107, 24, 255] },
    { value: 25, color: [236, 84, 19, 255] },
    { value: 30, color: [236, 44, 19, 255] },
    { value: 40, color: [123, 23, 10, 255] },
    { value: 55, color: [91, 11, 0, 255] },
  ],
})

const layer = new TemperatureLayer({
  colorramp: myTemperatureColoramp,
});
Note that all the color stop's value are in the actual unit of the layer (above: °C) and the colors are in [R, G, B, A].
Again, find more details on what's possible with color ramps on our official documentation;
Color blindness
Color blindness is the decreased ability to see colors or differences in colors.
The most common form is caused by a genetic disorder called congenital red–green color blindness.
source: Wikipedia
Because some forms of color blindness can affect up to 8% of the population, we thought it was fair that our library includes some perceptually uniform color ramps that are more color blind friendly.
The description from TypeScript auto completion will let you know about this information, otherwise, look for the ramps based on one of the following:
MakoTurboRocketCividis

License
MapTiler Weather JS Module
Copyright © 2023 MapTiler AG. All rights reserved.
The software and files (collectively “Software”) in this repository are licensed for use only with MapTiler service(s).
For the license terms, please reference MapTiler General Terms and Conditions which incorporate MapTiler Weather JS Module Product Terms (collectively “Terms”) and Privacy Policy at Privacy policy.
This license allows users with an active MapTiler account to modify and integrate authorized portions of the Software for use with the relevant MapTiler service(s) in accordance with the MapTiler Terms. This license terminates automatically if a user no longer maintains a MapTiler account or their usage breaches MapTiler Terms.
